Vellum Projects
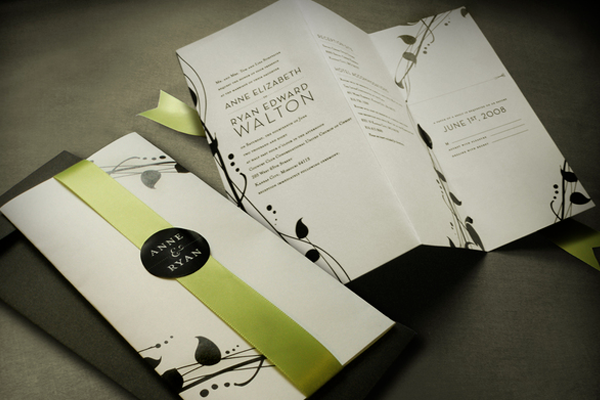
Vellum has become more and more popular in use of wedding invitations, so why not use it with other projects as well? Directions included here are for Invitations, Candles, Bags and Cards. The directions are easy to follow and the project itself is very easy to do. Enlist the help of family and friends to help! Supplies for these crafts can be purchased at any of your local craft stores.
You can do an entire theme with this project! Start with the invitations; instead of buying premade invitations, make your own! This way you have complete control over what they look like and how they are presented.
Create a lovely centerpiece using the candle vellum project. Group together several votive glasses on a tier or wrap the vellum around taller glass candle containers; the candlelight will give off a soft romantic glow. Make sure you check with your reception venue about using these open-flame containers. You can also use the votive candles as beautiful favors as well.
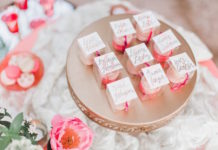
The vellum bags carry on the theme; use them to hold your wedding favors. Use the fold-over cards as thank you cards for after the wedding.


MATERIALS NEEDED FOR ALL PROJECTS:
- Stamp of your choice
- Pigment ink pad
- Embossing powder
- Heat gun
- Scissors
INSTRUCTIONS:
VOTIVE CANDLE WRAP

- ADDITIONAL MATERIALS NEEDED FOR CANDLE WRAP:
- 8 1/2″ x 11″ sheet of transparent vellum
- Votive cup and candle
- Tape runner or double stick tape
- Pencil
- Measure the votive cup by wrapping the transparent vellum around it. Mark with a pencil the height and width of the votive cup adding a 1/2″ to the width.
- Cut out the measured piece of vellum.
- Stamp and emboss designs on cut piece as desired.
- Trim the top of the wrap with decorative scissors if desired.
- Run a line of double-sided tape down one seam of the stamped vellum. Wrap around the votive cup and stick two ends together to secure.
VELLUM BAG

ADDITIONAL MATERIALS NEEDED FOR BAG:
- 8 1/2″ x 11″ sheet of transparent vellum
- Hole punch
- 1 yard ribbon of your choice (organdy and sheers look beautiful with this vellum)
- Something rectangle or square to fold vellum around (i.e. two medium stamps taped together)
- Tape runner or double sided tape
- Decorative scissors (optional)
- Stamp and emboss an 8 1/2” x 11” sheet of transparent vellum as desired. This can be an all over pattern or one main design in the center of the page.
- Wrap the entire sheet, length wise, around something rectangular or square, leaving enough space so that the two edges can be secured together.
- Run a line of double-sided tape down one seam and stick two sides together.
- Fold the bottom of the bag like you would wrap a package. Secure folded edges with double-sided tape or tape runner.
- Pull the object that the paper is wrapped around out of the bag.
- Narrow sides can be creased like a paper sack or left smooth. To crease sides, simply fold center of the side in until two edges meet. Crease all three edges, 2 sides and center point. Have a brown paper sack near by to use as a model.
- Open end of sack can be trimmed with decorative scissors or left straight. Fill with goodies and fold over. Punch two holes in center of folded over part about 1/2” – 1” down. Thread ribbon through holes. Tie ribbon in a bow or knot.
VELLUM CARD OVERLAY

ADDITIONAL MATERIALS NEEDED FOR OVERLAY:
- Transparent vellum – postcard size
- Colored or decorative postcard size cardstock (can also cut regular size cardstock to size)
- Hole punch
- 6″-9″ ribbon of choice
- Decorative scissors (optional)
- Stamp a postcard sized background as desired, or choose an already printed postcard.
- Use the postcard size transparent vellum to overlay the background. Use a printer or stamp in invitation information.
- Center the two cards together and punch two holes through the top of both pieces of paper about 1/2″ down.
- Weave ribbon through holes to hold the two papers together. Each end of the ribbon goes through its own hole from the front of the paper to the back. Cross the ribbons in the back and bring ribbon ends back through opposite hole that it went through to begin with. Pull through so that ribbon lays across the top of the card and trim edges.
VELLUM FOLD-OVER CARDS

ADDITIONAL MATERIALS NEEDED FOR CARDS:
- Fold-over transparent vellum cardstock
- Background colored cardstock or patterned paper
- Hole punch
- 1 yard of ribbon
- Use a printed or stamped background paper. Cut the background paper to the size of the transparent fold-over card chosen. Simply lay the card over the background paper and trace with a light pencil.
- Stamp and emboss transparent card if desired.
- Punch two holes at the top edge of the fold, about 1”-2” apart, through the two layered cards. Weave the ribbon through the holes and tie a bow at the top.
- Optional: Embellish the card with die cuts or cut out shapes.
ADDITIONAL TIPS: To achieve a more pastel colored look on vellum, color with markers on the backside of the stamped image. For a bolder colored look, color on the front of the stamped image with markers. Pigment or water-based markers can be used. Fabrico ink can be used without embossing on the vellum. Just make sure to heat set it. Use embossing powder with an embossing marker or small tipped glue pen along the edges of the vellum to add an extra special flair.


