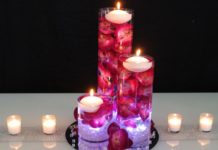
Lights of Love Centerpiece
 Not sure if you want to use silk or fresh flowers? Included in the directions are hints for both. Even if you put in what you would put into a bud vase, it looks elegant. You can also sink the pedestals into concrete in a terra cotta dish to make a planter with live plants. Be sure to line the wall of the dish on the inside with dry foam so the concrete doesn’t crack the dish. Add flowers in water tubes to the design. This is the least expensive way to go. Or even propagate ivy around the pedestals in the planter if you have time.
MATERIALS NEEDED:
- 3-14 inch plastic pedestals.
- Hot glue
- Glass dessert dish or other planter or dish
- Glass gems
- Acrylic Water
- Florist foam
- Tiny plastic cup (necessary if you are going to do fresh arrangement, optional if doing silk)
- Spanish moss (optional)
- Silk or fresh flowers and greenery
- 3 glass votive cups
- 3 votive candles
- Small amount of 1/4″ ribbon (optional)
- Fabric coated green wire cut in half (for silk)
- Stickum
INSTRUCTIONS:
- Cut 2 of the pedestals shorter than the others (see graphic).
- Hot glue ring (comes with pedestals) to top of pedestals. (You may wish to hot glue ribbon to the ring first. If you do it first be sure to put the bows facing the front when you hot glue your pedestals in). The graphic shows a bow that was put on to cover the ribbon seam.
- If your dish bottom is not level you may pour a thin layer of Acrylic Water and let it set. It is much easier to level it this way than to try to do it with hot glue. Hot glue pedestals to glass dish, foot side down (see graphic for where to put them) and make sure they are sitting straight. If you poured Acrylic Water to level the dish or plate just put a small amount more of the Acrylic Water to stick them to the plate. This is only temporary and will not ensure the hold of the pedestals to the glass dish.
- Pour in “Acrylic Water” (DO NOT USE ACRYLIC WATER IF YOU ARE MAKING A PLANTER) after following mixing direction. Add glass gems everywhere BUT the space inside of the pedestals. Put your plastic cup there if you are doing fresh. Or sink your wire there for the foam if you are doing silk (and do not wish to use a cup) – ends sticking up so when the time comes to put in the foam…the wires will hold it in securely. Make sure your pedestals are straight…..once set you will never be able to move them.
- Let set 24 hours or longer depending on the humidity.
- Your centerpiece is ready to design. Design like the graphic.
- Stick glass votive cups to pedestal rings with “Stickum”. Add candle. This step should be done AT the reception site not before transport; they are too top heavy that way. You may wish to set the arrangement on a mirror square. To make a larger centerpiece you may wish to use the 21″ pedestals and a larger plate.
NOTE:You may purchase many of the materials listed here at craft stores or places like Walmart.
The information on this instruction sheet is presented in good faith, but no warranty is given, nor results guaranteed, nor is freedom from any patent is to inferred. Since we have no control over physical conditions surrounding the application of information herein contained.


