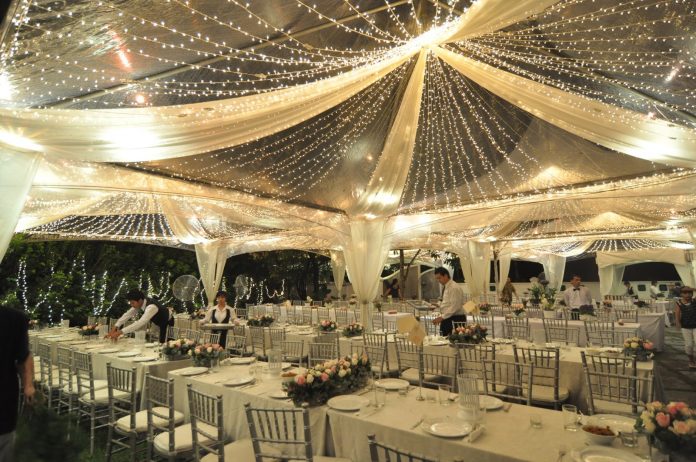
Twinkle Tent
 This beautiful tent will definitely add a wedding feel to your outdoor wedding! Use it to highlight your wedding cake, to keep your gifts safe, or as a beautiful backdrop for pictures! You can set up one in an out-of-the-way section, or build several to enhance the area even more.
This craft is more of a project than a craft. Although it can be done by one person, it is best tackled by several people. Its definitely not for the fainthearted! There is a lot of work involved in this beautiful tent, but the end results are not only breathless, but definitely worth all the effort!
This craft is courtesy of Country Sampler Decorating Ideas and is used by permission. They retain all rights; copyrights to all contents, directions, and images are the property of Country Sampler Decorating Ideas.
SUPPLIES AND TOOLS NEEDED:
- Market umbrella
- Umbrella stand with stakes or weighted base
- 2 plaster pedestals
- 70 yards of cheesecloth
- 3 yards of taupe and white striped cotton fabric
- 17 yards of white twill tape
- Eight 1 1/2″-diameter half-ball cover buttons from Dritz
- Several long strands of miniature white lights
- 20-gauge stem wire in 15″ to 18″ pieces
- Ceramcoat® acrylic paints in Sandstone, Burnt Sienna, Silver, and Boston Fern
- Stencil Magic® paint cream in Dusty Rose, Pink Carnation, Charcoal Green, and Jungle Green
- Matching thread
- Polyester fiberfill
- Silk flowers and vines
- Scissors
- Measuring tape
- Paintbrush
- Stencil brushes
- Hot glue
- Spray acrylic sealer
- Plastic twist tie
INSTRUCTIONS:
SIDE DRAPES
- Cut two cheesecloth panels for each section of your umbrella. We cut sixteen 3-yard-long panels for our octagonal umbrella.
- Measure the distance between the umbrella spines. For each side, cut a length of twill tape 2′ longer. We cut eight 74″-long strips of tape.
- Overlap two lengths of cheesecloth in the middle to make a panel wide enough to fit the space between the spines. At the top, fold the raw edge of the overlapped panel over 1/2″ and zigzag to a length of twill tape, leaving a foot of tape loose at each end. Tie a knot in each loose end of tape to prevent unraveling. Repeat for each section of the umbrella.
ROSETTES
- To make the rosettes, cut eight 10″ x 44″ pieces of striped fabric. Fold each piece in half lengthwise, with right side out. Sew sides together by running a gathering stitch along the long raw edges. Pull up the thread to form a rosette circle from each strip. Stuff with polyester fiberfill.
- Cover the buttons with striped fabric, following manufacturer’s instructions.
- Cut eight 10″ pieces of stem wire. Insert a piece of wire into each button shank. Bend wire in half and twist together to secure. Insert button through the hole in the rosette with wires going through rosette. Apply hot glue to backside of button to hold it in place. Repeat for remaining rosettes.
POLE COVER
- Measure diameter of pole and add 2″. For the pole cover, cut two strips that are each 6″ wide by 2 yards long, from striped fabric. Fold each strip in half lengthwise, with right sides facing.
- Join edges and run a gathering stitch 1″ from the raw edge. Gathering allows the fabric to grip the pole, preventing it from sliding off.
- Check that the tube will fit on the pole. Loosely pull up gathering stitches. Secure thread. Trim excess fabric. Turn right side out. Repeat to make second tube.
PEDASTALS
- Base-coat the pedestals with Sandstone paint.
- Mix a wash of three parts water and two parts Burnt Sienna paint. Brush the wash over the raised decoration on the pedestals and any recessed areas to give the pedestals an aged look.
- Tint and highlight these areas with a wash of Boston Fern; then, highlight with Silver.
- Using a stencil brush, highlight bows, roses, and grapes with Dusty Rose and Pink Carnation paint creams. Shade the leaves with Charcoal Green and Jungle Green paint creams.
- Seal with spray acrylic.
ASSEMBLY
- Slide the tubes onto the umbrella pole, arranging and evenly spacing the gathers.
- Set up the umbrella in desired location on level ground. Make sure it is stable, either staked to the ground or set in a weighted stand.
- Closely wrap the strands of miniature white lights around the pole, starting at the bottom. Leave the plug accessible. When you’ve covered the pole with lights, start stringing the lights along each spine out to the end and back to the middle. Hold the wires of the lights in place using plastic-covered twist ties. Move to the next spine. Note: On the last spine, we strung the lights out to the edge of the umbrella and went around the perimeter twice.
- Hang cheesecloth panels so they drape across each side of the umbrella. Tie the tapes to the spines at either side. Tie the very end of each panel in an overhand knot. Arrange drapes to lay evenly.
- Cut eight 6″ pieces of stem wire. To create the swag around the outside top edge of the umbrella, measure the space between spines, add 12″, and multiply by the number of sections. Cut two pieces of cheesecloth to this length. Mark each section by gathering cloth and wrapping with wire. We used 22 yards to make a double-layer continuous swag around the umbrella.
- Beginning at the end of one spine, wire end of cheesecloth to spine. Swag over to next spine.
- Drape the cheesecloth loosely. Wire and affix to spine. Repeat all around umbrella.
- Wire rosettes to spines on top of swags. Around each rosette, wire bunches of silk flowers to trail across swag. Pin in place.
- Set the pedestals on either side of a spine to make a doorway. Pull layers of cheesecloth to drape onto a pedestal. Nestle an arrangement in this drape atop each pedestal. Don’t leave pedestals permanently outdoors or set them in a wet area. Protect pedestal base with plastic.
The information on this instruction sheet is presented in good faith, but no warranty is given, nor results guaranteed, nor is freedom from any patent is to inferred. Since we have no control over physical conditions surrounding the application of information herein contained, Country Sampler Decorating Ideas disclaims any liability for untoward results.


